Friday, 30 January 2015

Hierarchical address books

You can configure a hierarchical address book (HAB), which is a feature available to end users in Microsoft Outlook 2010 or later. With an HAB, users can look for recipients in their Exchange organization by using an organizational hierarchy based on seniority or management structure.

The hierarchical address book (HAB) allows end users to look for recipients in their address book using an organizational hierarchy. Normally, users are limited to the default global address list (GAL) and its recipient properties and the structure of the GAL often doesn't reflect the management or seniority relationships of recipients in your organization. Being able to customize an HAB that maps to your organization's unique business structure provides your users with an efficient method for locating internal recipients.

1. Create a distribution group that will be used for the root organization (top-level tier). If desired, you can use an existing organizational unit in your Exchange forest for the distribution group.

2. Create distribution groups for the child tiers and designate them as members of the HAB. Modify the SeniorityIndex parameter of these groups so they're listed in the proper hierarchical order within the root organization.

3. Add organization members. Modify the SeniorityIndex parameter of the members so they're listed in the proper hierarchical order within the child tiers.

4. For accessibility purposes, you can use the PhoneticDisplayName parameter, which specifies a phonetic pronunciation of the DisplayName parameter.

Although you can't use the EAC to enable a HAB, after it’s enabled you can use the EAC to manage the membership of the groups in the organizational hierarchy.

1. Create an OU named HAB in your organization.

2. Create the root distribution group (name it by your organisation) for the HAB.

New-DistributionGroup -Name "MyOrg,Ltd" -DisplayName "MyOrg,Ltd" -Alias "MyOrgRoot" -OrganizationalUnit "test.local/HAB" -SamAccountName "MyOrgRoot" -Type "Distribution"


3. Designate MyOrg,Ltd as the root organization for the HAB.

Set-OrganizationConfig -HierarchicalAddressBookRoot "MyOrg,Ltd"

4. Create distribution groups for the other tiers in the HAB. For this example, you would create the following groups: CEO’s Office, Operations, Sales & Marketing, Human Resources, Accounting Group, and Administration Group. This example creates the distribution group CEO’s Office.

New-DistributionGroup -Name "CEO Office" -DisplayName "CEO Office" -Alias "CEOOffice" -OrganizationalUnit "test.local/HAB" -SamAccountName "CEOOffice" -Type "Distribution"

5. Designate each of the groups as members of the HAB. For this example, you would designate the following groups as being hierarchical groups: MyOrg,Ltd, CEO Office, Operations, Sales & Marketing Organization, Human Resources and Accounting.

Set-Group -Identity "MyOrg,Ltd" -IsHierarchicalGroup $true


6. Add each of the subordinate groups as members of the root organization. For this example, distribution groups CEO Office, Operations, and Sales & Marketing, are added as members of the root organization MyOrg,Ltd in the HAB.

Add-DistributionGroupMember -Identity "MyOrgRoot" -Member "CEOOffice"

7. Add each of the groups that are subordinate to the distribution group CEO Office as members of the group. For this example, distribution groups HR and Accounting, are added as members of the distribution group CEO Office.

Add-DistributionGroupMember -Identity "CEOOffice" -Member "HR"

8. Add users to the groups in the HAB.

Add-DistributionGroupMember -Identity "groupname" -Member "username"

9. Set the SeniorityIndex parameter for groups in the HAB. For this example, the CEO Office group contains 2 child groups: Human Resources and Accounting. Instead of having the groups listed in ascending alphabetical order, which is the default, the preferred sorting will be Human Resources (SeniorityIndex = 80), Accounting Group (SeniorityIndex = 70).

Set-Group -Identity "HR" -SeniorityIndex 80

The SeniorityIndex parameter is a numerical value used to sort groups or users in descending numerical order in a HAB. If the SeniorityIndex parameter isn't set or is equal for two or more users, the HAB sorting order uses the PhoneticDisplayName parameter value to list the users in ascending alphabetical order. If the PhoneticDisplayName value isn't set, the HAB sorting order defaults to the DisplayName parameter value and lists the users in ascending alphabetical order.

10. Set the SeniorityIndex parameter for users in the HAB groups. For this example, the CEO Office group contains three users: Amy Alberts, David Hamilton, and Rajesh M. Patel. Instead of having the users listed in ascending alphabetical order by default, the preferred sorting will be David Hamilton (SeniorityIndex = 100), Rajesh Patel (SeniorityIndex = 50), and then Amy Alberts (SeniorityIndex = 25).

Set-User -Identity "DavidH@test.local" -SeniorityIndex 100


Enable or disable hierarchical address books
Hierarchical address books
.

OAB in Exchange Server 2013

In Exchange 2013, the Offline Address Book (OAB) is generated by each Exchange 2013 Mailbox server(s) that hosts a special type of arbitration mailbox, called organization mailbox. OAB generation is not bound by the Server parameter anymore.

The unbinding of OAB from a specific server allows the same OAB to be generated by multiple Mailbox servers. This new architecture provides greater resiliency in OAB generation.

The OABGeneratorAssistant, a mailbox assistant running under the Microsoft Exchange Mailbox Assistants service, generates the OAB. Like most other mailbox assitants, the OABGEnerationAssistant is a throttled process – it runs or pauses according to the workload on the server.

The OAB files are generated and stored in the Organization Mailbox first and later copied to the %ExchangeInstallPath%\ClientAccess\OAB\ folder.

In Exchange 2013, OAB files are not stored locally on the CAS. CAS 2013 proxies all OAB download requests to the appropriate Exchange 2013 Mailbox server. With this change in the architecture, the Microsoft Exchange File Distribution Service is removed from the CAS role.

In Exchange 2013, this is the flow of OAB download:

Outlook receives OAB URL from Autodiscover and reaches designated CAS 2013 through OAB URL.

The CAS server performs the following actions:

1. Performs initial authentication for OAB.
2. Queries Active Directory and determines the closest Organization Mailbox for the requesting user.
3. Queries Active Directory again to determine the mailbox database hosting the Organization Mailbox.
4. Queries the Active Manager to determine the mailbox server where the mailbox database is active (mounted).
5. Proxies the request to the Mailbox server identified in step 4.
6. Retrieves OAB files and passes them to the client.

The Organization Mailbox is a new type of arbitration mailbox introduced with Exchange 2013. The arbitration mailbox with persisted capability OrganizationCapabilityOABGen is referred to as Organization Mailbox. It plays a crucial role in OAB generation, storage and distribution. Each Exchange Server 2013 mailbox role hosting an Organization Mailbox will generate all Exchange 2013 OAB’s defined in the environment. The OAB is generated in the Organization Mailbox first and later copied to the disk.

For a non-DAG environment, use following command to identify the OAB Generation servers:
Get-Mailbox -Arbitration | where {$_.PersistedCapabilities -like "*oab*"} | ft name,servername


For a DAG environment, identifying OAB generation server(s) is a two-step process:

Step1: Identify the mailbox database hosting organization mailbox with OAB Gen capability:
Get-Mailbox -Arbitration | where {$_.PersistedCapabilities -like "*oab*"} | ft name,database

Step2: Identify the mailbox server where the database hosting organization mailbox is mounted:
Get-MailboxDatabaseCopyStatus mbx01


The server where database status is “mounted” is the current OAB generation server.

The following example creates OAB for address list named “Global Address List FAB”:
New-OfflineAddressBook -Name OAB-FAB -AddressLists "Global Address List FAB"

Move the organization mailbox to a mailbox database on a server intended to be designated as OAB Generation server.

DB1 is a single copy database present on the server Exch1 and hosts the organization mailbox. DB2 is mailbox database present on Exch2.

The following command can be used to move the organization mailbox to DB2 and make Exch2 the OAB generation server.

Get-Mailbox -Arbitration -database db1| where {$_.PersistedCapabilities –like “*oab*”} | New-MoveRequest -TargetDatabase db2

Administrators can create additional Organization Mailboxes for fault tolerance or for serving users in a geographically disbursed Exchange deployment.

Step1: Create a new arbitration mailbox

New-Mailbox -Arbitration -Name "OAB Seattle" -Database DB2Seattle -UserPrincipalName oabs@contoso.com –DisplayName “OAB Mailbox for Seattle”

Step2: Enable OABGen capability

Set-Mailbox -Arbitration oabs -OABGen $true

The OAB Generation till Exchange Server 2010 was based on a “Schedule” set on OAB properties. You might see a “Schedule” defined when viewing properties of Exchange 2013 OAB. But, the Exchange Server 2013 OAB generation does not take place according to the “Schedule” defined on OAB properties:

Get-OfflineAddressBook “Default Offline Address Book” | fl schedule

Instead, Exchange Server 2013 OAB Generation takes place according to OABGeneratorWorkCycle and OABGeneratorWorkCycleCheckpoint properties configured at the Mailbox Server.

Get-MailboxServer ExMBX01 | fl *oab*


These default values mean OAB is generated once every day.

To change the OAB generation schedule so it runs every 4 hours:
Set-MailboxServer ExMBX01 -OABGeneratorWorkCycle 01.00:00:00 -OABGeneratorWorkCycleCheckpoint 04:00:00

The new OAB generations can be confirmed in the Application log under events with Source: MSExchangeMailboxAssistants and ID: 17002.

The Exchange Server 2013 CAS role proxies the OAB download request to an appropriate Mailbox role server. The CAS role maintains log of each request it handles in the log files, present in folder %ExchangeInstallPath%\Logging\HttpProxy\OAB\

These log files are an excellent tool to identify which mailbox server the CAS chose to serve the request.

TargetServer Name of Mailbox role server to which request was proxied

Below command will force OAB generation of an OAB named "Default Offline Address Book" across all organization mailboxes.
Update-OfflineAddressBook "default offline address book"

Exchange Server 2013 CAS role proxies the OAB download request to a “nearest” mailbox server hosting an active Organization Mailbox. It can proxy the request in round robin fashion if it finds more than one organization mailbox active in same AD site. Prior to CU5, this will result in frequent full OAB downloads and is therefore, not recommended.

Prior to CU5, customers should only deploy a single OAB generation mailbox per Exchange organization to prevent users from accessing different OAB generation mailboxes and requiring a full OAB download. With CU5 and later, customers can assign OABs to specific OAB generation mailboxes and not have to worry about accidentally triggering full OAB downloads due to accessing different OAB generation mailboxes.

What happens to my existing OABs when I upgrade to CU5?

When you upgrade to CU5, all existing OABs are linked to the system arbitration mailbox, SystemMailbox{bb558c35-97f1-4cb9-8ff7-d53741dc928c}, regardless of whether there are additional OAB generation mailboxes within the environment. This ensures that all OABs are still generated after CU5 is installed. This has two implications:

1. If you were not aware of our guidance of deploying only a single OAB generation mailbox per organization, and instead, deployed multiple OAB generation mailboxes, those mailboxes will no longer generate OABs after the servers hosting their databases are upgraded to CU5. This means that Outlook clients will perform a full OAB download (as they are now accessing a different OAB instance).

2. Once you dedicate an OAB to a specific OAB generation mailbox, this will be a new OAB instance and thus, will trigger a full download for the Outlook clients.

Note: Users will not experience full OAB downloads after CU5 is deployed if your deployment does not contain multiple OAB generation mailboxes.

Does upgrade order of roles matter?

The upgrade order of the roles only matters if you have multiple OAB generation mailboxes deployed. In CU5, the HTTP proxy logic in the Client Access server role was updated to ensure that an OAB request is routed to the correct OAB generation mailbox. Therefore, it is important to upgrade your Client Access servers prior to upgrading your Mailbox servers if you have multiple OAB generation mailboxes deployed in your environment. If you upgrade your Mailbox servers to CU5 before upgrading your Client Access servers, users will potentially be routed to OAB generation mailboxes that are not responsible for the OAB the user is requesting, resulting in failed download requests.

How do I dedicate an existing OAB to specific OAB Generation Mailbox?

Once CU5 is deployed, you can dedicate existing OABs to specific OAB generation mailboxes by executing the following command, utilizing the GeneratingMailbox parameter:

Set-OfflineAddressBook "Portland OAB" –GeneratingMailbox "CN=OAB Mailbox 1,CN=Users,DC=contoso,DC=com"

The GeneratingMailbox parameter only accepts the distinguished name value of the OAB generation mailbox; other identity types (e.g., domain\account, UPN, alias, etc.) do not work.

Once you have linked the OAB to an OAB generation mailbox, you will need to execute Update-OfflineAddressBook:

Update-OfflineAddressBook "Portland OAB"

To change the default OAB:

Set-OfflineAddressBook -Identity "My OAB" -IsDefault $true

Change the default offline address book
Managing OAB in Exchange Server 2013
OAB Improvements in Exchange 2013 Cumulative Update 5
OAB in Exchange Server 2013
Offline address book procedures
.

Enable MailTips in Exchange 2013

MailTips are informative messages displayed to users while they're composing a message. Microsoft Exchange Server 2013 analyzes the message, including the list of recipients to which it's addressed, and if it detects a potential problem, it notifies the user with MailTips prior to sending the message. With the help of the information provided by MailTips, senders can adjust the message they're composing to avoid undesirable situations or non-delivery reports (NDRs).

MailTips are implemented as a web service in Exchange 2013. When a sender is composing a message, the client software makes an Exchange web service call to the Client Access server to get the list of MailTips. The server responds with the list of MailTips that apply to that message, and the client software displays the MailTips to the sender.

The following messaging clients support MailTips:

• Outlook Web App
• Microsoft Outlook 2010 or later

The feature warns the sender about potential issues:

Invalid Internal Recipient: The sender adds a recipient that appears to be internal to the organization but doesn't exist.

Mailbox Full: The sender adds a recipient whose mailbox is full and your organization has implemented a Prohibit Receive restriction for mailboxes over a specified size.

Automatic Replies: The sender adds a recipient who has turned on Automatic Replies.

Custom: The sender adds a recipient for whom a customized MailTip is configured.

Restricted Recipient: The sender adds a recipient for which delivery restrictions are configured prohibiting this sender from sending messages.

External Recipients: The sender adds a recipient that's external, or adds a distribution group that contains external recipients.

Large Audience: the sender adds a distribution group that has more than the large audience size configured in your organization. By default, Exchange displays this MailTip for messages to distribution groups that have more than 25 members.

Moderated Recipient: The sender adds a recipient that's moderated and informs the sender that this may result in delay of the delivery.

Reply-All on Bcc: Te sender receives a Bcc copy of a message and selects Reply to All.

Oversize Message: The message the sender is composing is larger than configured message size limits in your organization.

MailTips are subject to the following restrictions:

• Due to the complexity of the implementation, the message size limits on the connectors in your organization aren't taken into account when processing Oversize Message MailTip.

• MailTips aren't supported when working in offline mode in Outlook.

• When a message is addressed to a distribution group, the MailTips for individual recipients that are members of that distribution group aren't evaluated. However, if any of the members is an external recipient, the External Recipients MailTip is displayed, which shows the sender the number of external recipients in the distribution group.

• If the message is addressed to more than 200 recipients, individual mailbox MailTips aren't evaluated due to performance reasons.

• Custom MailTips are limited to 175 characters.

• If the sender starts composing a message and leaves it open for an extended period of time, the Automatic Replies and Mailbox Full MailTips are evaluated every two hours.

Enable MailTips for the entire organisation:
Set-OrganizationConfig -MailTipsAllTipsEnabled $true

Configure the large audience size for your organization:
Set-OrganizationConfig -MailTipsLargeAudienceThreshold 50

Configure custom MailTips for recipients:
Set-Mailbox "Help Desk" -MailTip "A Help Desk representative will contact you within 2 hours."

Controlling the MailTips access scope:

When you enable MailTips over an organization relationship and set the access level to All, the recipient-specific MailTips, Mailbox Full, Automatic Replies, and custom MailTips, are returned for all users. However, you may only want to allow these MailTips for a specific set of users. For example, if you set up an organization relationship with a partner, you may want to allow these MailTips only for the users that work with that partner.

To achieve this, you need to first create a group and add all users for whom you want to share recipient-specific MailTips to that group. You can then specify that group on the organization relationship.

After you implement this restriction, your Client Access servers will first verify whether the recipient for whom they received a MailTips query is part of this group. If the recipient is a member of this group, the Client Access servers will proxy back all MailTips including the recipient-specific MailTips. Otherwise they won't include the recipient-specific MailTips in their response.

Configure custom MailTips for recipients
Configure the large audience size for your organization
Enable or disable MailTips
MailTips
MailTips over organization relationships
Manage MailTips for organization relationships
.

Wednesday, 28 January 2015

High-Availability in Exchange 2013

HA requirements

• Multiple SMTP links to the internet and between internal sites.
• Multiple DNS servers for multiple copies of MX records.
• At least 2 Mailbox servers in at least 2 sites with configured DAGs.
• If CAS server is installed separately, 2 CAS servers in 2 sites with a load balancer.

Shadow redundancy keeps a redundant copy of the message while the message is in transit. Safety Net keeps a redundant copy of a message after the message is successfully processed. So, Safety Net begins where shadow redundancy ends.

Shadow Redundancy

Shadow redundancy minimizes message loss due to server outages. It requires multiple Exchange Mailbox servers:

• If the second Mailbox server is not in a DAG, it must be in the same AD site.
• If it is in a DAG, it can be in either local or remote site (preferred).
• The primary and the shadow server communicate through a heartbeat.

The major improvement to shadow redundancy in Microsoft Exchange Server 2013 is that the transport server now makes a redundant copy of any messages it receives before it acknowledges successfully receiving the message back to the sending server. The sending server's support or lack of support for shadow redundancy doesn't matter. This helps to ensure that all messages in the Exchange 2013 transport pipeline are made redundant while they're in transit. If Exchange 2013 determines the original message was lost in transit, the redundant copy of the message is redelivered.

When the primary server successfully transmits the message to the next hop, and the next hop acknowledges receipt of the message, the primary server updates the discard status of the message as delivery complete. The discard status is basically a message that contains of list of messages that are being monitored. A successfully delivered message doesn't need to be kept in a shadow queue, so once the shadow server knows the primary server has successfully transmitted the message to the next hop, the shadow server moves the shadow message from the shadow queue into Safety Net.

Shadow Redundancy Manager is the core component of an Exchange 2013 transport server that's responsible for managing shadow redundancy. Shadow Redundancy Manager is responsible for maintaining the following information for all the primary messages that a server is currently processing:

• The shadow server for each primary message being processed.
• The discard status to be sent to shadow servers.

Shadow Redundancy Manager is responsible for the following for all the shadow messages that a shadow server has in its shadow queues:

• Maintaining the list of primary servers for each shadow message.

• Comparing the original database ID and the current database ID of the queue database where the primary copy of the message is stored.

• Checking the availability of each primary server for which a shadow message is queued.

• Processing discard notifications from primary servers.

• Removing the shadow messages from the shadow queues after all expected discard notifications are received.

• Deciding when the shadow server should take ownership of shadow messages, becoming a primary server.

• Tracking message bifurcations and other side-effect messages like delivery status notifications (DSNs) and journal reports to verify the redundant copy of the message isn't released until all forks of the message are fully processed.

Disable shadow redundancy (it’s on by default):
Set-TransportConfig –ShadowRedundancyEnabled $false

Reject messages that have not been shadowed (these are accepted by default):
Set-TransportConfig –RejectMessageOnShadowFailure $true

Set the message status check wait time for a shadow server (default is 2 mins):
Set-TransportConfig –ShadowHeartbeatFrequency

Set how long a shadow server waits for an unreachable primary server to respond before assuming it’s failed (default is 3 hours):
Set-TransportConfig - ShadowResubmitTimeSpan

Set how long a server retains discard events for successfully delivered messages (default is 2 days):
Set-TransportConfig –ShadowMessageAutoDiscardInterval

Set how long to keep successfully processed primary messages in Primary Safety Net, and acknowledged shadow messages in Shadow Safety Net (default is 2 days):
Set-TransportConfig –SafetyNetHoldTime

How long a message can remain in a queue before it expires (default is 2 days):
Set-TransportService –MessageExpirationTimeout

Database Availability Groups

In Microsoft Exchange Server 2013, the primary mechanism of mailbox high availability is the database availability group (DAG).

A database availability group (DAG) is a set of up to 16 Microsoft Exchange Server 2013 Mailbox servers that provides automatic, database-level recovery from a database, server, or network failure. DAGs use continuous replication and a subset of Windows failover clustering technologies to provide high availability and site resilience. Mailbox servers in a DAG monitor each other for failures. When a Mailbox server is added to a DAG, it works with the other servers in the DAG to provide automatic, database-level recovery from database failures.

When you create a DAG, it's initially empty. When you add the first server to a DAG, a failover cluster is automatically created for the DAG. In addition, the infrastructure that monitors the servers for network or server failures is initiated. The failover cluster heartbeat mechanism and cluster database are then used to track and manage information about the DAG that can change quickly, such as database mount status, replication status, and last mounted location.

• Create a DAG (specify a 15 character name that's unique within the Active Directory forest).
• Add Mailbox servers to the DAG (up to 16).
• Determine passive copies of the active databases.

If you are creating a DAG that will contain Mailbox servers that are running Windows Server 2012 R2, you also have the option of creating a DAG without a cluster administrative access point. In that case, the cluster will not have a cluster name object (CNO) in Active Directory, and the cluster core resource group will not contain a network name resource or an IP address resource.

When you create a DAG, an empty object representing the DAG with the name you specified and an object class of msExchMDBAvailabilityGroup is created in Active Directory.

DAGs use a subset of Windows failover clustering technologies, such as the cluster heartbeat, cluster networks, and cluster database (for storing data that changes or can change quickly, such as database state changes from active to passive or the reverse, or from mounted to dismounted or the reverse). Because DAGs rely on Windows failover clustering, they can only be created on Exchange 2013 Mailbox servers running the Windows Server 2008 R2 Enterprise or Datacenter operating system, Windows Server 2012 Standard or Datacenter operating system, or Windows Server 2012 R2 Standard or Datacenter operating system.

The witness server (ensures only 1 instance of a DB is active at any time) cannot be a member of the DAG – this prevents split-brain syndrome.

The witness server and its directory are used only when there's an even number of members in the DAG and then only for quorum purposes. You don't need to create the witness directory in advance. Exchange automatically creates and secures the directory for you on the witness server. The directory shouldn't be used for any purpose other than for the DAG witness server.

The requirements for the witness server are as follows:

• The witness server can't be a member of the DAG.
• The witness server must be in the same Active Directory forest as the DAG.
• The witness server must be running Windows Server 2012, Windows Server 2008 R2, Windows Server 2008, Windows Server 2003 R2, or Windows Server 2003.
• A single server can serve as a witness for multiple DAGs. However, each DAG requires its own witness directory.

Regardless of what server is used as the witness server, if the Windows Firewall is enabled on the intended witness server, you must enable the Windows Firewall exception for File and Printer Sharing.

If the witness server you specify isn't an Exchange 2013 or Exchange 2010 server, you must add the Exchange Trusted Subsystem universal security group (USG) to the local Administrators group on the witness server prior to creating the DAG. These security permissions are necessary to ensure that Exchange can create a directory and share on the witness server as needed.

When a DAG has been deployed across two datacenters, a new configuration option in Exchange 2013 is to use a third location for hosting the witness server. If your organization has a third location with a network infrastructure that is isolated from network failures that affect the two datacenters in which your DAG is deployed, then you can deploy the DAG’s witness server in that third location, thereby configuring your DAG with the ability automatically failover databases to the other datacenter in response to a datacenter-level failure event. If your organization only has two physical locations, you can use a Microsoft Azure virtual network as a third location to place your witness server.

If your DAG members are running Windows Server 2012, you must pre-stage the CNO (Cluster Name Object) prior to adding the first server to the DAG. If your DAG members are running Windows Server 2012 R2, and you create a DAG without a cluster administrative access point, then a CNO will not be created, and you do not need to create a CNO for the DAG.

Safety Net aka Transport Dumpster

• Provides message redundancy after the message has been processed in a queue on the Mailbox server within a transport high-availability boundary.
• Processed by Transport Service.
• By default, it keeps the second copy of each message for 2 days (can be configured) – including delivered messages in order to ensure delivery in case of a database failover to its passive copy.

The transport dumpster was first introduced in Exchange 2007, and was further improved in Exchange 2010 to provide redundant copies of messages after they're successfully delivered to mailboxes in DAGs. In Exchange 2010, the transport dumpster helped protect against data loss by maintaining a queue of successfully delivered messages that hadn't replicated to the passive mailbox database copies in the DAG. When a mailbox database or server failure required the promotion of an out-of-date copy of the mailbox database, the messages in the transport dumpster were automatically resubmitted to the new active copy of the mailbox database. The transport dumpster has been improved in Exchange 2013 and is now called Safety Net.

• Safety Net is a queue that's associated with the Transport service on a Mailbox server. This queue stores copies of messages that were successfully processed by the server.

• You can specify how long Safety Net stores copies of the successfully processed messages before they expire and are automatically deleted. The default is 2 days.

• Safety Net doesn't require DAGs. For Mailbox servers that don't belong to a DAGs, Safety Net stores copies of the delivered messages on other Mailbox servers in the local Active Directory site.

• Safety Net itself is now redundant, and is no longer a single point of failure. This introduces the concept of the Primary Safety Net and the Shadow Safety Net. If the Primary Safety Net is unavailable for more than 12 hours, resubmit requests become shadow resubmit requests, and messages are re-delivered from the Shadow Safety Net.

• Safety Net takes over some responsibility from shadow redundancy in DAG environments. Shadow redundancy doesn't need to keep another copy of the delivered message in a shadow queue while it waits for the delivered message to replicate to the passive copies of mailbox database on the other Mailbox servers in the DAG. The copy of the delivered message is already stored in Safety Net, so the message can be resubmitted from Safety Net if necessary.

• In Exchange 2013, transport high availability is more than just a best effort for message redundancy. Exchange 2013 attempts to guarantee message redundancy. Because of this, you can't specify a maximum size limit for Safety Net. You can only specify how long Safety Net stores messages before they're automatically deleted.

The Primary Safety Net exists on the Mailbox server that held the primary message before the message was successfully processed by the Transport service. This could mean the message was delivered to the Mailbox Transport service on the destination Mailbox server. Or, the message could have been relayed through the Mailbox server in an Active Directory site that's designated as a hub site on the way to the destination DAG or Active Directory site. After the primary server processes the primary message, the message is moved from the active queue into the Primary Safety Net on the same server.

The Shadow Safety Net exists on the Mailbox server that held the shadow message. After the shadow server determines the primary server has successfully processed the primary message, the shadow server moves the shadow message from the shadow queue into the Shadow Safety Net on the same server. Although it may seem obvious, the existence of the Shadow Safety Net requires shadow redundancy to be enabled, and shadow redundancy is enabled by default in Exchange 2013.

The message is retained in Primary Safety Net and Shadow Safety Net until the message expires based on a configurable timeout value. If a mailbox database failover occurs before the message expires, the Primary Safety Net on Mailbox01 resubmits the message. If the Mailbox01 isn't available, the Shadow Safety Net on Mailbox03 takes over and resubmits the message.

There are two basic Safety Net message resubmission scenarios:

• After the automatic or manual failover of a mailbox database in a DAG.
• After you activate a lagged copy of a mailbox database.

Like message resubmission from Primary Safety Net, message resubmissions from Shadow Safety Net are fully automated, and require no manual intervention. Without optimization, resubmitting messages from Safety Net would result in potentially large numbers of duplicate deliveries. Duplicate deliveries within the Exchange organization aren't a problem, because duplicate message detection prevents mailbox users from seeing duplicate copies of a message. But duplicate message delivery to recipients outside the Exchange organization will result in duplicate copies of messages. Fortunately, the resubmission of messages from Safety Net has been optimized in Exchange 2013 to reduce duplicate message delivery.

Managing database availability groups
Planning for high availability and site resilience
Safety Net
Shadow redundancy
Transport high availability
.

Monday, 26 January 2015

In-Place Archiving in Exchange 2013

In-Place Archiving requires either Outlook 2013/2010/2007 stand-alone or MS Office Professional Plus 2013/2010/2007 volume licenses.

It’s also available with Outlook in MS Office 365 ProPlus, Office 365 Enterprise E3 and Office 365 Midsize Business subscriptions.

As it’s considered to be a premium feature in Exchange Server 2013, it requires Standard + Enterprise CALs for all email users.

  • It allows admins to create separate databases for archiving emails and to keep these on a low-performance/cost storage. 
  • It supports quotas, basic message tagging and automated processing either through Exchange retention policies or user-defined rules. 
  • Just as normal databases, archive can be protected by DAGs. 
  • It has limited search capabilities. 
  • Single instance storage is not supported, and data deduplication and compression of active databases (and these archive DBs are active ones) is not supported either. 
  • It does not support any non-Exchange hosted email content.

In-Place eDiscovery is an improved version of a discovery search feature from Exchange 2010 and it supports search across the content in Exchange, Lync and SharePoint.

As in Exchange 2010, archiving is configured through retention tags and policies, and it can be combined with cleanup of deleted items.


Considerations for Archiving in Exchange Environments
Exchange 2013 In-Place Archive – Email Client Requirements
Exchange 2013 storage configuration options 
Exchange Server 2013: Archive with elegance
Microsoft Exchange Archiving: Native vs third-partySolutions
Outlook license requirements for Exchange features
What’s New in Exchange 2013 Archiving and eDiscovery
Why Third Party Archiving is Still Essential in Microsoft Exchange
.

Saturday, 24 January 2015

Install and configure the built-in antispam and antimalware protection in Exchange 2013

Install and configure antispam agents:

Anti-spam agents available on a Mailbox server:

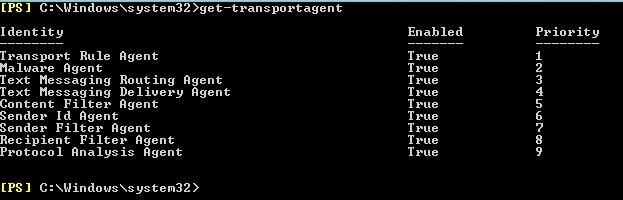
Based on the default priority value of the anti-spam agent, and the SMTP event in the transport pipeline where the anti-spam agent is registered, the following list describes the agents and the default order in which they are applied to messages on a Mailbox server:

1. Content Filter agent
2. Sender ID agent
3. Sender Filter agent
4. RecipientFilter agent
5. Protocol Analysis agent for sender reputation


Anti-spam agents available on an Edge Transport server:

Based on the default priority value of the anti-spam agent, and the SMTP event in the transport pipeline where the anti-spam agent is registered, this is the default order in which the anti-spam agents are applied on an Edge Transport server:

1. ConnectionFiltering agent
2. SenderFilter agent
3. RecipientFilter agent
4. SenderID agent
5. ContentFilter agent
6. ProtocolAnalysis agent for sender reputation
7. AttachmentFiltering agent


Install antispam agents:

Run the Install-AntiSpamAgents.ps1 script:
ExchangeInstallPath\Scripts\Install-AntiSpamAgents.ps1

Restart the Microsoft Exchange Transport Service:
Restart-Service MSExchangeTransport

Specify the internal SMTP servers in the organisation:
Set-TransportConfig -InternalSMTPServers @{Add="<ip address1>","<ip address2>"...}


Configure antimalware policy:

• An antimalware policy is added by default.
• The available actions do not allow a message and/or attachments to be quarantined, but only deleted, so false-positves cannot be recovered and released.
• The filter seems to be concerned with attachments only, that is, it does not inspect the message body itself (e.g. for dangerous links and/or images).
• The external senders probably should not be notified as that would confirm that the email address is valid.


Third party solutions:

A 3rd party solution such as Cisco IronPort appliance or software based GFI MailEssentials running on a Windows server with SMTP service installed and acting as an SMTP gateway may be more secure (multiple AV scan engines from different vendors) and more manageable solution (more options for granular configuration and easier management).

Anti-spam and anti-malware cmdlets
Anti-spam and anti-malware protection
Anti-spam protection
Cisco IronPort
Configure Anti-Malware Policies
Enable anti-spam functionality on Mailbox servers
GFI MailEssentials
Manage sender filtering
.

Thursday, 22 January 2015

Install and configure Exchange 2013 on Windows 2012 R2

Server licenses:

With this license type, a license must be assigned for each instance of the server software that is being run. There are two server editions:

Standard: designed for the mailbox needs of small to midsize organizations. Also appropriate for non-mailbox roles in a larger Exchange deployment. This edition supports 1 to 5 mailbox databases.

Enterprise: designed for larger organizations that may require a greater number of mailbox databases. This edition supports 1 to 100 mailbox databases.

When virtualising Exchange:

# vCPU =< # pCPU cores of a NUMA node
vRAM =< pRAM of a NUMA node
(If you have to cross NUMA boundary, you may need to map vCPUs to cores across multiple sockets, otherwise the CPU scheduler will move vCPUs around if needed.)

Ensure the allocated memory is reserved as Exchange does not support dynamic memory management.

Use multiple vSCSI controllers for data drives.
Use SCSI Passthrough or Paravirtual SCSI (PVSCSI) disks if they perform faster than e.g. LSA.

Only block-level storage is supported.
Hyper-V Live Migration and VMware vMotion are supported. 
VMware vSphere HA failover is supported.

Hyper-V Quick Migrataion is not supported.
Hypervisor snapshots (due to DAG replication issues), differencing and dynamically expanding disks are not supported.

Minimum hardware resources:

vCPU: up to 16 per VM, supported vCPU to core ratio is 2:1 (1:1 is recommended). 
RAM: 8 GB for Mailbox and 4 GB for CAS, or 8 GB for both roles on the same VM.
Windows page file: static size = RAM GB + 10MB.
Storage: 30 GB for Exchange installation files.
              500 MB for each UM language pack.
              500 MB for the message queue database.
              Use the calculator to determine the transport DB size as it sits in OS drive.
             
Active Directory prerequisites:

Forest/Domain functional level at least Server 2003.
Every site requires DC and GC (RODC is not supported).
AD CPU power:  ~1 AD CPU core per 8 Mailbox server CPU cores.
Prepare AD schema needs to be performed in the same domain and site where AD schema master resides.

Find the schema master:
netdom query /domain:domain name fsmo


Setup /PrepareSchema (prepares the schema)
Setup /PrepareAD /OrganizationName:Organisation Name (prepares the schema and AD)
Setup /PrepareDomain (prepares the local domain)
Setup /PrepareDomain: FQDN of the Domain
Setup /PrepareAllDomains (prepares all domains)

Install prerequisite features:

Install Remote Server Administration Tools Admin Pack:

Install-WindowsFeature RSAT-ADDS

Install the required Windows components:

Install-WindowsFeature AS-HTTP-Activation, Desktop-Experience, NET-Framework-45-Features, RPC-over-HTTP-proxy, RSAT-Clustering, RSAT-Clustering-CmdInterface, RSAT-Clustering-Mgmt, RSAT-Clustering-PowerShell, Web-Mgmt-Console, WAS-Process-Model, Web-Asp-Net45, Web-Basic-Auth, Web-Client-Auth, Web-Digest-Auth, Web-Dir-Browsing, Web-Dyn-Compression, Web-Http-Errors, Web-Http-Logging, Web-Http-Redirect, Web-Http-Tracing, Web-ISAPI-Ext, Web-ISAPI-Filter, Web-Lgcy-Mgmt-Console, Web-Metabase, Web-Mgmt-Console, Web-Mgmt-Service, Web-Net-Ext45, Web-Request-Monitor, Web-Server, Web-Stat-Compression, Web-Static-Content, Web-Windows-Auth, Web-WMI, Windows-Identity-Foundation

Install prerequisite tools:

Unified Communications Managed API 4.0 Runtime
Microsoft Office 2010 Filter Packs (these are already included with Search Foundation, except for OneNote and Publisher files)
Service Pack 1 for Microsoft Office Filter Pack 2010(KB2460041) 64-bit Edition

Prepare Active Directory:

Take a full backup of Active Directory.

Extend AD schema - the account needs to be in Schema and Enterprise Admins groups:

D:\Exchange 2013>Setup /PrepareSchema /IAcceptExchangeServerLicenseTerms


Wait for the AD replication to complete - use repadmin to confirm.

Prepare AD - the account needs to be a member of Enterprise Admins group:

Make sure the changes to schema have been replicated to all DCs before preparing AD.

D:\Exchange 2013>Setup /PrepareAD /OrganizationName:Organisation Name /IAcceptExchangeServerLicenseTerms


Wait for the AD replication to complete - use repadmin to confirm.

Prepare AD Domains - the account needs to be a member of Enterprise Admins group:

Make sure the changes to AD have been replicated to all DCs before preparing domain(s).

D:\Exchange 2013>Setup /PrepareAllDomains /IAcceptExchangeServerLicenseTerms


Install Exchange Server

Create external DNS records:

A RR: point it to Edge or CAS server.
PTR RR: point it to A RR above.
MX RR: point it to A RR above.
SRV RR: name it _autodiscover._tcp.<smtpdomain>
or if SRV RRs are not supported:
CNAME RR: name it "autodiscover.domain.com" and point it to A RR above.
SPF RR: domain_name.com.      IN TXT     "v=spf1 mx a -all"

Connectors:

Add additional Receive connectors if required.
Create a new Send connector and select email servers or point it to an SMTP smart host.


Exchange 2013 prerequisites
Exchange 2013 Server Role Requirements Calculator
Exchange Server 2013 licensing
Microsoft Exchange Server Deployment Assistant
Prepare Active Directory and domains
.

Monday, 13 January 2014

Missing emails and mailbox folders - issues with shared mailboxes (Exchange & Outlook 2010)


Here are some interesting examples of problems with missing or misplaced emails that happen when multiple users share a mailbox (e.g. assistant/manager or multiple users/service mailbox).

User A manages mailbox B. Mailbox B is attached to Outlook of user A, and user A has full access to mailbox B, that is, can send messages as user B and can delete messages from mailbox B.

When user A sends emails from user B's mailbox, the copies of these emails are stored in user A’s sent items, but not in user B’s sent items.

When user A deletes messages from mailbox B, these messages end up in user A’s deleted items folder, instead of in user B’s deleted items folder.

Sometimes, users who manage someone else’s mailbox accidentally move emails and/or folders to their own mailboxes. Then others with similar access wonder what happened to these emails and folders.

Here is how to ensure that sent and deleted emails are always stored in the owner’s mailbox. These new values need to be set up for each mailbox delegate and can be deployed through GPO.


Deleted items:

• For Outlook 2013
HKEY_CURRENT_USER\Software\Microsoft\Office\15.0\Outlook\Options\General

• For Outlook 2010
HKEY_CURRENT_USER\Software\Microsoft\Office\14.0\Outlook\Options\General

• For Outlook 2007
HKEY_CURRENT_USER\Software\Microsoft\Office\12.0\Outlook\Options\General

• For Outlook 2003
HKEY_CURRENT_USER\Software\Microsoft\Office\11.0\Outlook\Options\General

• For Outlook 2002
HKEY_CURRENT_USER\Software\Microsoft\Office\10.0\Outlook\Options\General

• For Outlook 2000
HKEY_CURRENT_USER\Software\Microsoft\Office\9.0\Outlook\Options\General

Right-click the DelegateWastebasketStyle value, and then click Modify.

If the key is not present, use the following steps to create it:

a. Right-click the General folder in the path that is defined in step 4 in the "To Switch the Destination of Deleted Items" section earlier in this article.
b. Point to New, and then click DWORD Value.
c. Type DelegateWastebasketStyle, and then press Enter.

Change the value data in the Edit DWORD Value dialog box to one of the following values:

8 = Stores deleted items in your folder.
4 = Stores deleted items in the mailbox owner's folder.


Sent (as) items:

Key: HKEY_CURRENT_USER\Software\Microsoft\Office\14.0\Outlook\Preferences
Name: DelegateSentItemsStyle
Type: DWORD
Value: 1


If users report missing emails and/or folders, these can be located through the Discovery feature (Multi-Mailbox Search) of Exchange Control Panel.

Go to https://cas-server/ecp/ and log in as admin or a user with the permission to run Multi-Mailbox Search. Go to Mail Control > Discovery. Click on New to open a New Mailbox Search wizard window. Here, set up filtering using one or more of the following:

Email/subject keyword(s)
Sender/recipient email address
Date range (from-to)
Mailboxes to search

For example, if emails are missing from a mailbox 123, and there are 7 different users who have access and manage the mailbox, then all these 7 mailboxes need to be searched.

The last section of the new search wizard is: Search Name, Type and Storage Location. Here set the name of the search (this will be the name of the folder with the results), select “Copy the search…”, remove the tick mark from Enable deduplication, select Enable full logging, and if the mailbox is not selected, select the Discovery Search Mailbox. Click Save and periodically click the refresh button. Once completed, the Status will change to Search Succeeded and the Size will show the size of the search results. If Size shows 0 B, it means the search didn't find anything, so you need to change the filtering parameters and re-run the search.


To see the results in your Outlook, grant yourself full access to the Discovery mailbox, and it will pop up in your Outlook after a while. The results of the search will appear as a new folder. If the folder cannot be expanded, just collapse the Discovery mailbox and expand it again, then check the folder again.

If the emails were moved or deleted to another user’s mailbox, there will be a subfolder with that user name (as a mailbox) followed by subfolders (the name of the search > username > Inbox > xyz folder > etc).

Here is an example:

A user reported a subfolder with all its messages missing from a common shared mailbox. The user provided the subject of one of the messages that were stored in the missing subfolder and the date range when the message was received, so I searched for the message in all the mailboxes that were granted full access and send as permissions over the shared mailbox, and found that one of the delegates moved the entire folder to her own Inbox. The search result looked like this:


The resulting folder structure helps to locate the messages and folders that contain these messages. The reading (right) pane lists the messages.

More info:

Email that you send on behalf of someone is not saved in their Sent Items folder
Give Users Access to Multi-Mailbox Search
Items that are deleted from a shared mailbox go to the wrong folder in Outlook
Messages that are sent by using the "Send As" and "Send on behalf" permissions are copied only to the Sent Items folder of the sender in an Exchange Server 2010 environment
Save Sent Items in owner’s mailbox

Thursday, 10 January 2013

Migrating mailboxes between Exchange 2010 servers

Build and configure new servers, then configure CAS and HT selection as required (in case there are multiple CAS and HT servers).

Moving mailboxes between databases in Exchange 2010 server(s) can cause issues such as detection of corrupted items. If a move request is configured to skip mailboxes in case a corruption is detected, such mailboxes will be skipped (this is recommended option).

It seems that it’s not possible to find out what items were detected as corrupted, so the only way to migrate such mailboxes is to configure the number of corrupted items:

Skip the corrupted messages > Maximum number of messages to skip: …

To find out how many items were detected as corrupted, start with 1 and increase if necessary.

Note: The issue with detecting corrupted items in mailboxes during a move occurs only in Exchange 2010 SP2 RU3, RU4 and RU5, so it’s probably wise to keep the Exchange 2010 on SP2 without installing the latest RU until the migration of mailboxes is completed, and then upgrade the new Exchange with the latest RU that has been out for some time and without any major issues reported.

If a new CAS is introduced in the Exchange Organisation, the clients will continue connecting to the old CAS. To force the clients to connect to the new CAS, once the move is completed and the old CAS can be decommissioned (in case it’s not required any longer), uninstall Exchange from the old CAS and remove its RR from DNS. This will prompt clients to discover the new CAS and connect without end-user intervention. In case Outlook cannot connect, the end-user will need to re-run the profile configuration wizard, which will force the client to connect to the new server.

If a new HT is introduced in the Exchange Organisation, the mail servers will start load balancing the traffic between all the HT servers in their local site, so configure the mail servers to use a specific HT server(s) if it's necessary to isolate the traffic. If connectors have not been configured for the new HT server, and a mail server starts sending messages to the new HT server for SMTP delivery, the messages will be queued, and will not be processed even after connectors have been created and configured. To process those messages, restart the transport service on the HT server in question, once the connectors have been configured.

Useful cmdlets:

List all databases and their CAS servers:
get-MailboxDatabase | fl Name,RpcClientAccessServer

Configure a database to use a specific CAS server:
Set-MailboxDatabase -Identity dbName -RPCClientAccessServer CAS server name

Identify HT servers used by mailbox servers for outgoing email:
get-mailboxserver | fl Name,SubmissionServerOverrideList

Configure a mailbox server to use a specific HT server:
Set-MailboxServer -Id: Mail server name -SubmissionServerOverrideList: HT server name

List mailboxes in a specific database:
get-mailbox -database DB name

List system mailboxes in a specific database:
get-mailbox -database DB name –arbitration | ft -wrap -auto

To move all the system mailboxes from one database to a new database:
get-mailbox -database current DB name -arbitration | new-moverequest -targetdatabase new DB name

If a database cannot be deleted due to an active move request, even though Get-MoveRequest doesn’t return anything, you may need to dismount the database and then remove it through ADSIEdit.

Microsoft Exchange Error (www.msexchange.org)


In ADSIEdit, select Connect to..., under "Select a well known Naming Context" select Configuration -> CN=Configuration -> CN=Services -> CN=Microsoft Exchange -> CN=YourExchOrgName -> CN=Administrative Groups -> CN=Exchange Administrative Group (FYDIBOHF23SPDLT) -> CN=Databases -> Select the database name and delete it.


Once completed, move the default OAB to the new server.

Dismount and delete old databases. Then uninstall Exchange from the old mail server.

More info:
Cannot remove mailbox database due to invisible move request
Corrupted Items and Mailbox Moves in Exchange 2010
Exchange 2010: How to Delete the First Database and Move the System Mailboxes
Identifying "corrupt" mailbox items in Exchange 2010 SP1 prior to mailbox move?
Moving mailboxes - where to find info on detected corrupted items?
The Case of the Hub Transport Server Load Imbalance
Warning: Failed to clean up the source mailbox after the move

Monday, 7 May 2012

Exchange 2010 SP2 – Calendar Repair Assistant

Several email users complained about issues with their calendars so I decided to turn CRA on and see if it helps. CRA is supposed to detect inconsistencies in multiple copies of the same event across several calendars and fix potential issues. Here is the official explanation of it:
The Calendar Repair Assistant is a configurable mailbox assistant that runs within the Microsoft Exchange Mailbox Assistants service on Microsoft Exchange Server 2010 Mailbox servers. The Calendar Repair Assistant automatically detects and corrects inconsistencies with single and recurring meeting items for mailboxes located on that Mailbox server. As a result, recipients won't miss meeting announcements or have unreliable meeting information.
Conflict detection and resolution is well explained here.

Here are a few useful commands:

Get global settings for all servers:
Get-MailboxServer | fl *calendar*

Check if calendar repair feature is on or off for a specific user:
Get-Mailbox username | fl CalendarRepairDisabled

Get all users with calendar repair feature on:
Get-Mailbox -Filter "CalendarRepairDisabled -eq `$false"

Disable calendar repair feature for all users:
Get-Mailbox | Set-Mailbox -CalendarRepairDisabled $true

Disable calendar repair feature for a specific user:
Set-Mailbox username -CalendarRepairDisabled $true

Enable repair of detected issues for a server (enabled by default):
Set-MailboxServer -Identity servername -CalendarRepairMissingItemFixDisabled $false

Set the log folder size limit (to 300 MB):
Set-MailboxServer -Identity servername -CalendarRepairLogDirectorySizeLimit 300MB

Configure for how long to keep the logs:
Set-MailboxServer -Identity servername -CalendarRepairLogFileAgeLimit 30

Set the number of days into the future to check and repair items:
Set-MailboxServer -Identity servername -CalendarRepairIntervalEndWindow 60

Change the default location of the log file:
Set-MailboxServer -Identity servername -CalendarRepairLogPath L:\CRA

Schedule the maintenance window (the time for actual repairs (e.g. every business day between 5:00 AM and 8:00 AM)):
Set-MailboxServer -Identity servername -CalendarRepairSchedule Monday.5:00-Monday.8:00,Tuesday.5:00-Tuesday.8:00,Wednesday.5:00-Wednesday.8:00,Thursday.5:00-Thursday.8:00,Friday.5:00-Friday.8:00

Set the work-cycle (how often to check the calendars for issues (e.g. check all calendars every day)) and checkpoint (how often to attempt repairs (e.g. if found any issues, attempt repairs every day during the day/time specified in the maintenance window)):
Set-MailboxServer -Identity servername -CalendarRepairWorkCycle 1.00:00:00 -CalendarRepairWorkCycleCheckpoint 1.00:00:00

Delete the maintenance window:
Set-MailboxServer -identity servername -CalendarRepairWorkCycle 00:00:00 -CalendarRepairWorkCycleCheckpoint 00:00:00

Delete the work-cycle settings:
Set-MailboxServer -Identity servername -CalendarRepairSchedule Monday.0:00-Monday.0:00

The service desk guys should be informed about the change as they might start receiving calls about some strange things happening to peoples' calendars.

Default settings:

Configured:


More info:
Managing Calendars
Outlook: Troubleshooting guide for missing, duplicated or unsynchronized calendar items
What is the Enable logging (troubleshooting) option?

Thursday, 8 March 2012

Virtualised Exchange 2010 SP2 – Configure intersite DAG for DR without CAS array

I was asked to build a DR site for MS Exchange 2010 SP2 and replicate all DBs there. The client did not have requirements for load-balancing or fully automated fail-over solution so I was curious if it was feasible to build a functional DR system, to which users could switch over easily and quickly enough, without using 3rd party NLBs and CAS array.

Each site runs on VMware ESXi v5 clusters.

There is a 10 Mbps WAN link between the sites and Riverbed WAN accelerators at each side.


Build and configure the servers at the DR site:

At the main site, Exchange was running on 2 servers, one mailbox and one CAS/HT. So I built 2 VMs (Windows 2008 R2 Datacenter) at the DR site and configured CPU, RAM and drives. Since there was a single path between the 2 clusters, I assigned a single NIC to each server, for both MAPI and replication traffic.

As VMware recommends in Microsoft Exchange 2010 on VMware Best Practices Guide switch the NIC to VMXNET3 adapter for better performances. You may need to add a new adapter and remove the old one. You will get a prompt saying that “The IP address XXX.XXX.XXX.XXX you have entered for this network adapter is already assigned to another adapter“, but it will ask you if you want to delete the ghost adapter. Click Yes.

Use the VMXNET3 network adapter – this is a paravirtualized device that works only if VMware Tools is installed on the guest operating system. The VMXNET3 adapter is optimized for virtual environments and designed to provide high performance.

Both Microsoft and VMware now support VMware HA, DRS and vMotion for DAG servers. But take into consideration that a server will go offline for a moment during e.g. vMotion and how it is going to affect your configuration and any other applications (e.g. Blackberry) plugged into your Exchange system (with or without DAG).

Using VMware HA, DRS and vMotion with Exchange 2010 DAGs

Announcing Enhanced Hardware Virtualization Support for Exchange 2010

Dynamic memory allocation should be disabled if possible.

MS Exchange 2010 database cache and VMware ESX Server memory resource management

I installed Exchange servers, Mailbox role on one server and CAS and HT on another, and configured Server Configuration (entered license keys, imported and configured certificates, setup server limits etc).

During the installation of the first Exchange server (CAS/HT) I got the error below:


After some troubleshooting, I found that this could happen if the new server did not have right to ‘Manage auditing and security log’ on DCs, which is configured by granting the right to the group Exchange Servers in Domain Controllers Policy > Computer Configuration > Policies > Windows Settings > Security Settings > Local Policies/User Rights Assignment > Manage auditing and security log. I found that the GPO was there and the group added, but for some reasons someone set ‘deny read’ permission for several DCs, including the one at the DR site. Once the restriction was removed, the installation completed successfully.

I found that Riverbed accelerators were showing an error next to the DAG traffic entry, so I contacted their support guys in order to confirm that the software on these devices supported the DAG traffic. The software version in use was v6.1.2 and they confirmed that only v6.5.x and later supported DAG replication traffic. So I had to turn it off for the 2 mailbox servers until we update the devices.

To turn the optimisation off, I had to create 2 rules:

1. In-Path Rule

Configure > Optimization > In-Path Rules > New rule

Type: Pass Through
Source Subnet: DR_site_Riverbed_IP (add /32 to the IP)
Destination Subnet: Main_site_Riverbed_IP (add /32 to the IP)

2. Peering Rule

Configure > Optimization > Peering Rules

Type: Pass Through
Source Subnet: Main_site_Riverbed_IP (add /32 to the IP)
Destination Subnet: DR_site_Riverbed_IP (add /32 to the IP)


Designate 2 IPs that will be assigned to the DAG cluster and make exclusions for these in DHCP servers. Each address needs to be from the network range where mailbox servers reside, one IP for the main site and one for the DR site.


Create and configure DAG

I created a new DAG network in EMC, used the main CAS server as a witness server, and assigned the mailbox servers and cluster IPs to it. This can be done through EMS as well:

New-DatabaseAvailabilityGroup –Name DAGname –WitnessServer WitnessName –WitnessDirectory “WitnessDirectory” -DatabaseAvailabilityGroupIPAddresses cluster_IP_1, cluster_IP_2 –verbose

A virtual computer object with the name of the group (and the description: ‘Failover cluster virtual network name account’) is created in Active Directory and should be moved to the 'Exchange Servers’ OU. An A RR is created in DNS for the new DAG network with the IP of the active server.


Then I configured several features:

1. Turned off automatic fail-over:
In order to stay on the safe side, I did not automate fail/switch-over of databases. By default, the automatic fail-over is enabled.

Set-MailboxServer –Identity DR_mailbox_server -DatabaseCopyAutoActivationPolicy Blocked

2. Disable encryption and compression:
Exchange encryption and compression of DAG cluster replication traffic is in conflict with Riverbed’s compression and should be turned off. By default, both compression and encryption are enabled for traffic between different sites.

Set-DatabaseAvailabilityGroup -Identity DAGname -NetworkEncryption Disabled
Set-DatabaseAvailabilityGroup -Identity DAGname -NetworkCompression Disabled

3. Enable cross-site direct connect:
In order to allow the primary CAS server to connect to the DR mailbox server and the DR CAS server to connect to the primary mailbox server, cross-site direct connect needs to be enabled. It is disabled by default.

Set-DatabaseAvailabilityGroup –Identity DAGname -AllowCrossSiteRpcClientAccess: $true

A database can be added to a DAG by right clicking it and selecting ‘Add Mailbox Database Copy’. While testing it, I got several errors and was not able to set it up successfully. The database itself was replicated, but logs were not and the status of the passive copy remained in the ‘Resynchronising’ state indefinitely. The errors below describe the issue.


I found an article that suggests removing the database GUID from the registry of the database host in order to fix the issue, but I have not tried it.

A source-side operation failed. Error An error occurred while performing the seed operation. Error: Failed to open a log truncation context to source server….

Instead, I found that the safest way to set it up successfully is to create a new (empty) database and configure DAG replication for it. Once both databases are okay, showing as Mounted and Healthy, move all the mailboxes from the database that was supposed to be set up.

Note: While mailboxes are being moved between databases, Outlook will lose connection and then re-establish it once the move is completed. Duration of the outage depends on the size of the mailbox. So, moving mailboxes should probably be scheduled for after hours.


Switching/failing-over between sites:

I wanted to test how Outlook behaves in case a database, server or the whole site goes down, so I created a test DB and replicated it to the DR site, then moved 2 mailboxes to it and let the passive copy reach the Healthy state with 0 logs in its queue. Then logged to each account and open Outlook under their profiles, one at the main site and the other at the DR site. Then I moved the test DB from the main to the DR site and back, and manually switched between CAS servers.

Note: Automatic switch over of DAG databases is disabled. If an active database or the whole primary server goes offline, log on to any available Exchange server and mount a copy of the database in question at the DR server.

1. If the mailbox server at the primary site goes offline but the CAS server is available, once the databases are switched over to DR mailbox server, Outlook clients will auto-reconnect and no user action is required. It took only 2-3 seconds for Outlook to reconnect. Clients from all sites, including the DR site, will still be connecting through the primary CAS.

2. If the CAS at the main location goes offline, but the mailbox server is still online, a manual switch-over to the DR CAS is required. Logon to any Exchange server and in its EMS execute the following command for each affected database:

Set-MailboxDatabase -Identity “databasename” –RPCClientAccessServer DR_CAS_name

Clients will need to restart their Outlook, but no profile repair is required. In this case Outlook clients will be connecting to the DR CAS server and from there to the main mailbox server.

3. If both the main CAS and mailbox servers go offline, a manual switch-over for affected databases and the CAS server is required. Log on to any DR Exchange server and mount the affected databases on the DR mailbox server, then in EMS execute the following command for each affected database:

Set-MailboxDatabase -Identity “databasename” –RPCClientAccessServer
DR_CAS_name

Clients at all sites will need to restart their Outlook, but no profile repair is required. In this case Outlook clients will be connecting to the DR CAS server and from there to the DR mailbox server.

Note: After I switched CAS for a test DB, an Outlook client with caching turned off connected to the new CAS straight away, but another client which had caching turned on failed to connect even after several restarts of Outlook and profile repairs. Then I turned caching off and restarted Outlook, and it connected successfully. Then I re-enabled caching and restarted Outlook and it connected again.


OWA and ActiveSync connectivity:

OWA is part of the Exchange organisation and is auto-configured on the new CAS servers as they are joined to the organisation. The default OWA URL for DR CAS is

https://drcas.domain.com/owa

If you use OWA, you should probably use an alias for it, so set the TTL for the alias to 5 minutes and simply recreate it to point to the DR CAS in case of a switch over.

The same goes for the ActiveSync service. Use an alias and set its TTL to 5 minutes, then, in case the main CAS goes down, just recreate the record in DNS and point it to the DR CAS.


Setting up email flow for the DR site:

In order to restore email flow, in case the main CAS server or the whole main site goes down, it is necessary to reconfigure send and receive connectors, so the configuration used by the primary CAS server should be well documented.